Welcome to my my little place to create and collect. Not only do I have this wonderful nook of a room on the top floor of my old home, I also have the attic space to store things and to use as a cozy reading area. You know what else I have? A sweet ghost who likes to make their presence known.
Lucky for me, I've had a lot of experience with ghosts, so it just makes my little nook that much more welcoming. I feel like I have someone watching out for me. Maybe it is visiting, maybe it belongs to one of my antiques, or maybe they used to live here.
All of the life sized supplies featured came from my mom's desk and my grandmother's. My grandmother always used a fountain pen, and there are some of my mom's powdered pigments and items from her "Suzuri Bako" Japanese brush set.
The way the sunlight shines through my window brings such an amazing ambiance to my nook.
I have a wonderful collection of paintings and even began to paint some of my own.
I used two sets of the Freestanding Shallow Stairs and placed one on it's side so that I could have a double staircase, leading up to the top.
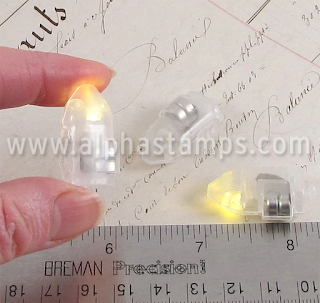
After slicing the bottom piece off of this
Single LED Light, I created a lamp shade with the same set of
Written Memories 12x12 papers and attached it to the top of the light. Just a flip of the side power switch and I had instant warmth and glow.
To add more character to the Leafy Swirl Desk, I took some
3-3/4 Inch Wooden Posts and sliced them in half with an exacto blade. It was an easy task and turned out better then I imagined.
Did you notice that the desk matches the Leafy Swirl Ceiling Inserts?
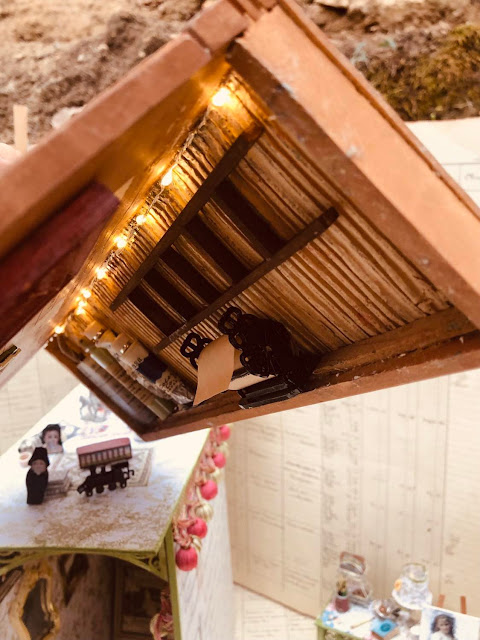
Above you can see the "ceiling" and how I attached this strand of
6V Warm White Fairy Lights, twisting and turning behind each Leafy Swirl Ceiling Insert. It was easier then I imagined and each section was glued down with a small section of the "wallpaper". Then I attached the battery pack/off/on switch with a piece of Velcro.
Here are some pics during assembly. I had to get all of the lights that I wanted done first, so that I could then attach it all together. I also built the "attic floor" so that it could hold my mom's old box of Cray-Pas, also lined with Fairy Lights.
Next, it was time for the fun part, creating the space into a maximalist dream hideaway.
Would you like to see the attic? I have some amazing treasures up there and on rainy days I sit on the old rug and create.
Some might be creeped out by my old dolls and doll heads, but I always remember that they were once loved by a child and now are loved by me. Each has it's own little personality, don't cha think?
Funny thing is when I leave the attic, I always turn the fairy lights off and tidy up. But time after time, I come up to toys strewn about, drawers opened up and the lights turned on. But it doesn't scare me in the slightest.
The light switch is there beside of the cabinet of drawers (actually there to disguise the battery box) and I have had numerous electricians in to check on things, but there never seems to be any problems.
Once I came up to find my roll of brown wrapping paper unrolled with little crayon marks all over. But I didn't get mad and told the ghost they were welcome to enjoy anything up there, as long as they are careful.
The roof of my home has been taken over by some beautiful ivy. My neighbor told me I really should remove it because it could damage the roof, but I just love the coziness it brings to my home and the extra touch of mother nature is always welcome.

.JPG)
.JPG)
.JPG)
.JPG)
.JPG)
.JPG)


.JPG)


.JPG)
.JPG)


.JPG)
.JPG)
.JPG)
.JPG)


.JPG)
.JPG)
.JPG)
.JPG)
.JPG)

.JPG)
.JPG)
.JPG)
.JPG)
.JPG)
.JPG)
.JPG)
.JPG)
.JPG)
.JPG)
.JPG)


.JPG)
.JPG)
.JPG)
.JPG)
.JPG)
.JPG)
.JPG)
.JPG)
.JPG)
.JPG)
.JPG)
.JPG)
.JPG)
.JPG)
.JPG)
.JPG)
.JPG)
.JPG)
.JPG)
.JPG)
.JPG)
.JPG)
.JPG)
.JPG)
3 comments:
So good seeing you create again. I love you are working in miniature and everything you created.
So lovely!!!
This is sooo darn cute. I love the attic and the incorporation of large-scale objects.
Post a Comment