

I remember a time when I would see beautiful crowns posted by others on line. I wouldn't have thought it would have been something that I could have achieved, but I finally did long ago. Now, I'm excited because Alpha Stamps latest kit is "Winter Crowns" which includes a crown template. You would be amazed how many designs you can create with it and just how easy it is to use.

I am going to show you my smaller crown first because this is the size it is intended for, but I will also show you how you can use this same template to create an even larger crown that you can actually wear on your head.

I'm impressed with how complicated it looks, but really the only difficult part is deciding what embellishments you want to use.


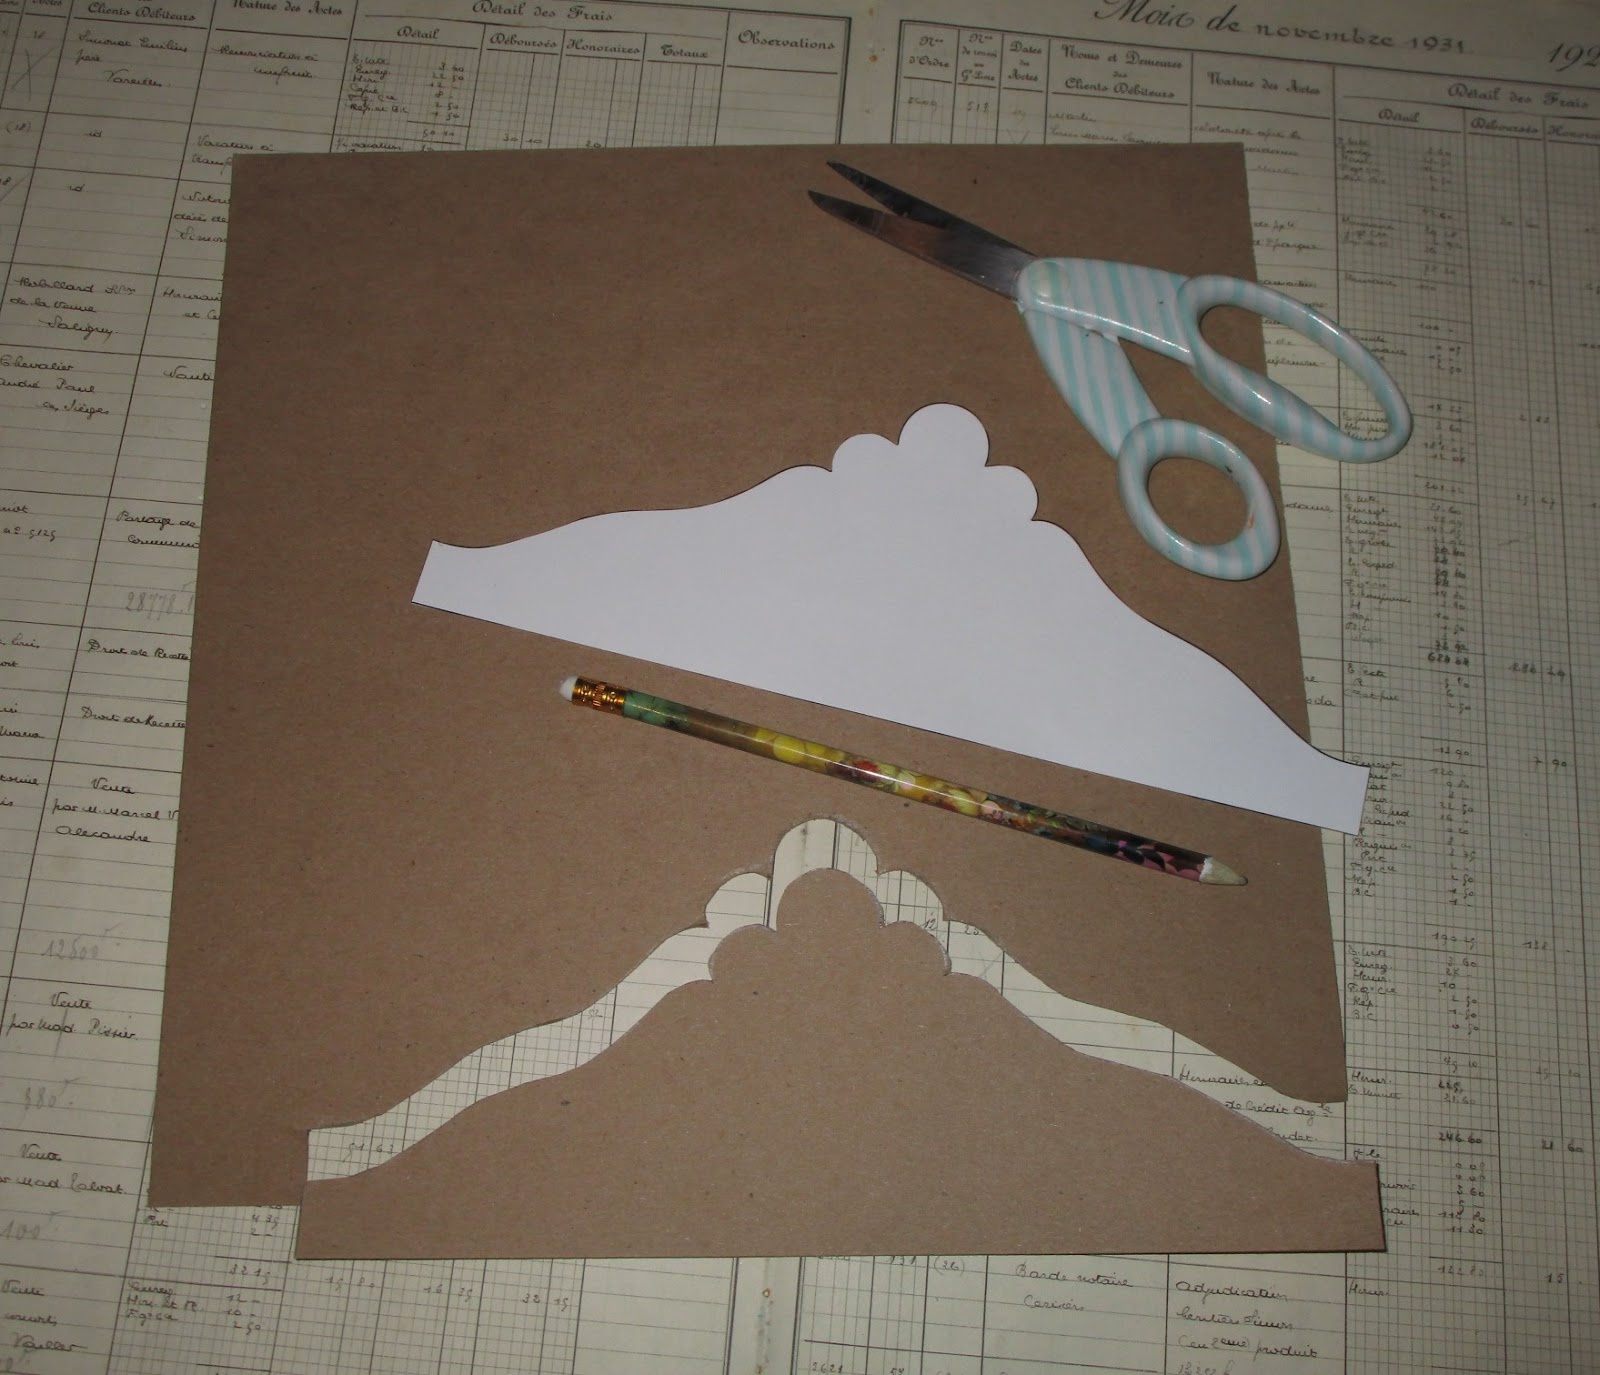
Whichever design you choose, I suggest that you trace it out first on thin cardboard. That way your crown will be strong.

Next, choose a patterned paper for the front and back of your crown.


I wrapped my crown gently around a bottle to help it curve more naturally.


The center part of my crown was created by cutting out the image of a frame. Then, I adhered it to matching patterned paper so that it would blend in with the rest of the crown.

Time to decorate!


To make the pearl frame even more incredible and indulgent, I added similarly sized pearls from the Tiny Mixed Size Flat-Backed Pearls, available at Alpha Stamps.


The precious Queen "B" Antoinette in her newest, royal crown. She is our only female pup, (thus the "B") and I named her Antoinette after the one and only Marie Antoinette. She is a love when she isn't yapping.

Now for the large crown, modeled by my amazing mini me, who was ready to kill me for taking pictures of her.

I attached a few strands of seam binding to each end so that it could be tied around her head.

Above you can see that I simply punched one hole on each end of the crown, then tied a knot on the inner side to hold the seam binding in place. I used extra long pieces so that there would be plenty of length to tie it around even the biggest head and have left over to elegantly flow down.


For this crown, I traced out the original stencil onto cardboard. Then, I traced it again, adding an extra inch or so to the bottom.

I placed the trimmed layer onto more cardboard, and created a larger third layer of my own.


After folding my third layer in half, so that both sides would be the same, I trimmed it out of the cardboard.

Yes, all cats believe they are the center of the universe and should place themselves wherever you are working.

Below you can see in red, the location where I punched holes after I added decorative paper.

Next step, add some decorative paper/papers to the layers.


When I finally knew the arrangement for bling, I placed only a line of glue at the bottom of each layer. That way I would be able to tuck things in here and there between the layers.
Now for the fun, playing around with embellishments. I love the more muted color of these Golden Night Wired Leaves. From there I chose vintage broaches with similar colors.


To make this Maidenhair Fern Pick, Silver Tinsel and pearl trim more suited to one another, I added a few sprits of color.

I dried the pearl trim carefully using a heating tool, usually used for embossing. The heat caused the ribbon to bunch in on itself and create a seam of sorts, but it is one of those, "do not try this at home" scenarios.

The real trick to a successful crown is to just enjoy the process and not be intimidated by it. Play around with the placement and different elements. I can't even tell you how many times I changed the items, but it all always falls into place.

So yes, I am the Queen, and I now have many beautiful crowns. With my template, lots of vintage goodies and beautiful supplies from the newest Alpha Stamps Winter Crown Kit, I will be making many, many more.
Thanks for visiting! I hope I inspired you to create something beautiful.
xoxo
Rhonda...
3 comments:
Your crowns are gorgeous!
These are both absolutely stunning - but that first one just knocks my socks off! True romantic royalty in miniature!
I have to give this a try. I have quite a few crowns already - but I can always use more!
Well, you ARE the Queen of creating crowns. Amazing crowns they are.
Hope you are doing well. I haven't looked at blogs in so long. I've got to catch up. xxoo Rhonda
Post a Comment