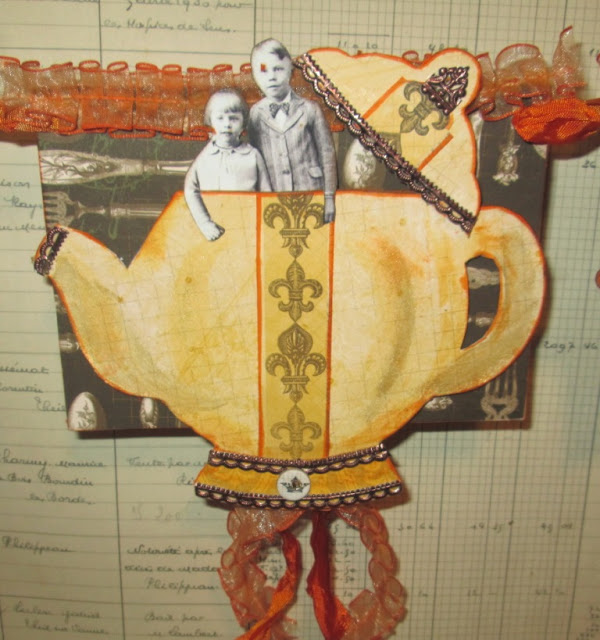
I used the Province Paper Collection and must have made dozens of these wonderful cups in two styles. I especially love that there is already an opening in the top of the tea cup, waiting for a wonderful color of brew or a child or two.
I color coordinated my ribbons and edges using the new Distress Inks and Paints in the color Carved Pumpkin.
I have to be honest, I never thought I would purchase a Big Shot Die-Cutting Machine, but I love it. I can run any size die through this machine and it's super easy to use.
Below is the Tea Time Tea Cup Die Set. It cuts out two types of teacups, one saucer and a teabag tag. Imagine all of the themes you could use this for. If my grandmother were still alive, I would create the most beautiful spring banner for her. She would have loved this, especially while telling me stories of old about the cups and saucers my great grandmother would paint.
Below you can see both cup styles un-decorated. It's easy to create depth by using some foam adhesive only on the larger part of the cup. Add another layer of paper to the back edge and you instantly have a beverage.
Below is an example of a plain cup, or the "before" and then the "full" cup.
Creating the ribbons was a piece of crumpet, I mean, a piece of cake. I used the Tim Holtz Crinkle Ribbon along with some stains in the carved pumpkin and a bit of Vintage Photo to customize my color. On one ribbon, I added a lighter coat of the ink and the Vintage Photo ink. The lowest ribbon I used more of the ink to make the color deeper. Then, using a low temperature iron, I wad up the ribbon and iron in the creases to "crinkle" it up. Occasionally I spray with water so the ribbon doesn't become too dried out.
I used this same method to color some Ivory Sheer Pleated Ribbon, which I used as a trim on all of my banner parts.
Now that I've shared my banner with you, I am really wanting a cup of tea I hope you enjoyed my TEAtorial. Have a TEAriffic day and thanks for stopping by!
For a complete supply list click here... Tea Banner Supply List


1 comment:
Your banner is adorable and it looks like it would be so much fun to make. Thank you for the step by step tutorial.
Your are a sweetie pie.
Have a happy Saturday!
Connie :)
Post a Comment